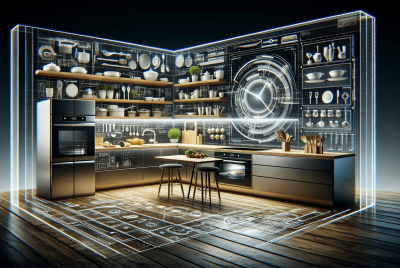
How Do You Make A Countertop Microwave Look Built In?
So you’ve got a countertop microwave that doesn’t quite fit in with the aesthetic of your kitchen. Maybe it’s taking up valuable counter space or just sticking out like a sore thumb. But fear not! There’s a solution to make that countertop microwave look like it was always meant to be built in. In this article, I’ll walk you through some clever tricks and tips to seamlessly integrate your microwave into your kitchen, giving it a sleek, built-in appearance that will have your guests in awe. It’s time to transform that eyesore into a stylish kitchen centerpiece.

Choosing the Right Microwave
When it comes to choosing the right microwave for your kitchen, there are a few factors to consider. The first thing you need to think about is the size of the microwave. Measure the available space in your kitchen to determine the appropriate dimensions for your microwave. This will ensure that it fits seamlessly into your kitchen layout.
In addition to size, it’s also important to look for built-in features. These features can include things like trim kits, which allow you to integrate the microwave into your cabinetry for a more cohesive look. Built-in features can also include additional functions and settings that make using the microwave more convenient and efficient.
Determining the Installation Space
Before you can begin the installation process, you need to determine the available space in your kitchen. Start by measuring the existing countertop space where you plan to install the microwave. This will help you decide on the appropriate size and model for your needs.
Next, evaluate the cabinet or wall space where the microwave will be placed. Take into consideration any nearby appliances, cabinets, or walls that may impact the installation process. Ensure that there is enough space for the microwave to fit properly and that it will not interfere with other kitchen elements.
Preparing the Installation Area
Once you have determined the installation space, it’s time to prepare the area for the microwave. Begin by clearing the countertop surface of any items or clutter. This will provide a clean and level area for the microwave to be installed.
Next, remove any obstacles or decorations that may impede the installation process. This includes items such as wall hangings, shelves, or decorative elements that could interfere with the placement or functionality of the microwave.
Creating a Trim Kit or Surround
If you want to make your countertop microwave look built-in, you can create a trim kit or surround that seamlessly integrates the appliance into your cabinetry. Research different trim kit options that are compatible with your microwave model. These kits provide a custom fit and can enhance the overall aesthetic of your kitchen.
Measure and cut the trim kit materials to accurately fit around the microwave. This will ensure that the kit matches the dimensions of the appliance and the surrounding cabinetry. Once the materials are cut to size, assemble the trim kit according to the manufacturer’s instructions.
Secure the trim kit onto the microwave using the provided hardware or adhesive. This will create a cohesive look and prevent any gaps or inconsistencies between the microwave and the cabinetry.

Installing the Microwave
With the preparation and customization steps complete, it’s time to install the microwave in the designated space. Start by positioning the microwave in the installation area, ensuring that it fits securely and aligns with the surrounding cabinetry.
Next, secure the microwave to the cabinet or wall. Follow the manufacturer’s instructions for proper installation, including using the recommended hardware and tools. This will ensure that the microwave is safely and securely attached to the desired location.
After securing the microwave, connect the electric power and ventilation. Follow the instructions provided with the appliance to ensure that the electrical connections are made correctly and the ventilation is properly set up. This will ensure the safe and efficient operation of the microwave.
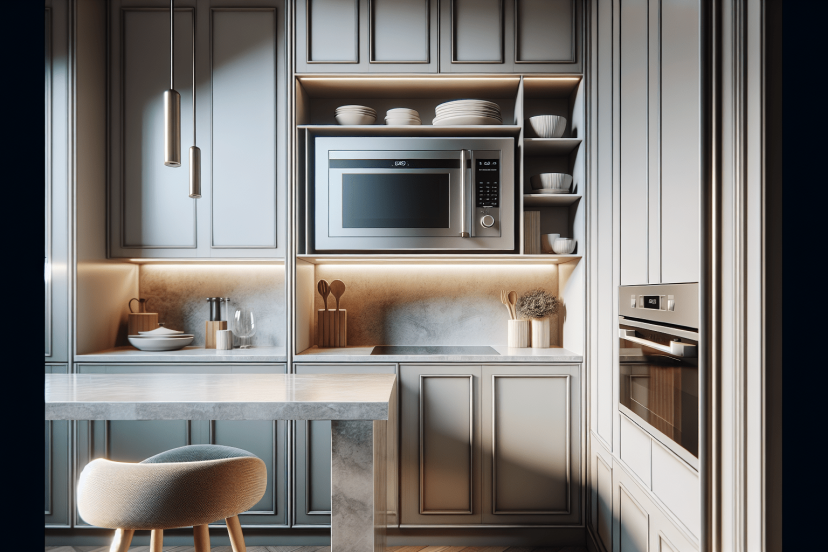
Seamless Integration with Cabinetry
To achieve a truly built-in look, it’s important to match the microwave’s finish to the cabinets in your kitchen. This creates a cohesive and unified appearance. If necessary, consider repainting or refinishing the cabinetry to match the microwave’s color and texture.
Additionally, you may need to adjust cabinet shelves or height to accommodate the microwave. Measure the dimensions of the appliance and make any necessary modifications to ensure a proper fit. This may involve removing or repositioning shelves or adjusting the height of the cabinet itself.
For a more seamless integration, you can also add fillers or panels to create a built-in look. These accessories can be customized to match your cabinetry, covering any gaps or spaces between the microwave and the surrounding cabinets.
Concealing Cord and Ventilation
To create a cleaner and more streamlined look, it’s important to conceal the power cord and ventilation ducts of the microwave. Start by routing the power cord and ventilation ducts behind the cabinetry or walls, if possible. This will minimize their visibility and create a neater appearance.
Consider using cord covers or concealing channels to hide the power cord. These accessories can be installed along the baseboard or behind the microwave itself, effectively hiding the cord from view. Ensure that the cord is securely fastened and does not pose any safety hazards.
Proper ventilation is essential for the safe operation of the microwave. Ensure that the ventilation ducts are properly installed and do not get blocked or obstructed by any surrounding elements. This will prevent overheating and maintain the longevity of the appliance.
Finishing Touches
Now that the installation is complete, you can focus on adding the finishing touches to enhance the appearance of your built-in microwave. Start by cleaning and polishing the exterior of the appliance. This will remove any dust, fingerprints, or smudges and leave your microwave looking shiny and new.
Next, check for proper operation of the microwave. Test all the functions and settings to ensure that everything is working correctly. If there are any issues, address them promptly to prevent further damage or inconvenience.
Consider adding decorative accents or panels to further enhance the appearance of the microwave. These can include things like stainless steel trim, decorative grilles, or custom panels that match your cabinetry. These additions can elevate the overall aesthetic of your kitchen.
For an extra touch, consider adding lighting to highlight the microwave and create a focal point in your kitchen. LED strip lights or under-cabinet lighting can be installed to illuminate the microwave and enhance its visibility, especially in the evening or dimly lit areas.
Safety Considerations
When installing a built-in microwave, it’s important to prioritize safety. Always follow the manufacturer’s instructions and guidelines to ensure proper installation and operation. This includes using the recommended hardware, electrical connections, and ventilation setup.
Avoid overheating or ventilation issues by providing adequate space around the microwave. Ensure that there is enough clearance for air circulation and that the ventilation ducts are free from obstruction. This will prevent any potential damage to the appliance and maintain its optimal performance.
Furthermore, ensure that the microwave is positioned at a safe distance from any flammable materials. This includes curtains, paper towels, or other combustible items. Keeping a safe distance will reduce the risk of fire hazards and maintain the safety of your kitchen.
Maintenance and Care
To keep your built-in microwave functioning properly and looking its best, regular cleaning and maintenance are essential. Clean the interior and exterior surfaces of the microwave regularly to remove any food splatters or stains. Use mild soap and water or a microwave-safe cleaner for best results.
Check for any signs of wear and tear, such as damaged buttons or loose hinges. Address any issues promptly to prevent further damage or potential safety hazards. Regular maintenance will help prolong the lifespan of your microwave and ensure its continued functionality.
In conclusion, transforming a countertop microwave into a built-in appliance requires careful consideration and proper installation techniques. By selecting the right microwave, preparing the installation area, creating a trim kit, and following safety guidelines, you can achieve a seamless integration that enhances the appearance and functionality of your kitchen. Regular maintenance and care will help to ensure the longevity and proper operation of your built-in microwave.