How Do I Clean And Maintain My Smart Kitchen Gadgets
In this informative article, you will discover essential tips on how to effectively clean and maintain your smart kitchen gadgets. With the rise in popularity of these innovative devices, it is important to know how to properly care for them to ensure their longevity and optimal performance. From smart refrigerators to voice-controlled ovens, we will guide you through the steps needed to keep your gadgets sparkling clean and running smoothly. Say goodbye to sticky fingerprints and hello to a well-maintained, smart kitchen!

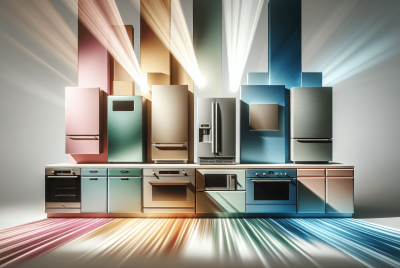
This image is property of images.pexels.com.
Understanding Your Smart Kitchen Gadgets
When it comes to your smart kitchen gadgets, it’s essential to have a solid understanding of their different parts and features. This knowledge will not only help you make the most out of your devices but also allow you to properly maintain them. Whether it’s a smart refrigerator, oven, dishwasher, coffee maker, blender, microwave, or cooker, each appliance comes with its unique set of components.
Identifying the parts and features of your gadgets
Take the time to familiarize yourself with the various parts and features of your smart kitchen gadgets. This will enable you to troubleshoot any issues that may arise and make the most out of the technology at your disposal. Consult the user manual or the manufacturer’s website for detailed diagrams and explanations of the different components. By understanding each part, from the control panel to the interior components, you’ll be better equipped to operate and maintain your smart kitchen gadgets effectively.
Using manual instructions and digital resources
When it comes to cleaning and maintaining your smart kitchen gadgets, both manual instructions and digital resources can be valuable tools. The user manual will provide you with step-by-step guidance on how to clean and maintain your device properly. Additionally, many manufacturers offer digital resources such as video tutorials or FAQs on their websites, which can further assist you in understanding the processes involved. Make sure to take advantage of these resources to maximize the lifespan and performance of your gadgets.
Understanding the technical specifications of your gadgets
Each smart kitchen gadget has its set of technical specifications that you should be aware of. These specifications include power requirements, recommended cleaning methods, and temperature settings, among others. By familiarizing yourself with the technical details provided by the manufacturer, you’ll gain a deeper understanding of your gadgets’ capabilities and limitations. This knowledge will allow you to operate them more efficiently and ensure that you’re maintaining them according to the manufacturer’s recommendations.
General Cleaning Procedures for Smart Kitchen Gadgets
Regular cleaning is vital to keep your smart kitchen gadgets in optimal condition. Not only does it help maintain their functionality, but it also ensures their longevity. Implementing routine cleaning guidelines will prevent the buildup of dirt, grime, and bacteria, ultimately enhancing the performance of your appliances.
Understanding the importance of regular cleaning
Regular cleaning is the cornerstone of maintaining the cleanliness and functionality of your smart kitchen gadgets. It prevents the accumulation of food residues, grease, and other contaminants that can affect the appliance’s performance. Additionally, regular cleaning helps avoid unpleasant odors and the growth of bacteria, creating a healthier and more hygienic kitchen environment.
Going over routine cleaning guidelines
To maintain your smart kitchen gadgets, it’s crucial to establish a routine cleaning schedule. Start by wiping down the exterior surfaces with a damp cloth and mild detergent. Avoid using abrasive cleaners or scrub brushes that may damage the finish. For the interior, follow the manufacturer’s instructions on how to clean specific components, such as removable shelves, drawers, or trays. Pay close attention to areas prone to spills, like the crisper drawer in your refrigerator or the bottom of your oven. Lastly, don’t forget to clean the control panels, buttons, and handles, as they can accumulate dirt and grime over time.
Utilizing special cleaning solutions
In some cases, special cleaning solutions may be required to tackle tough stains or eliminate stubborn odors. Manufacturers often provide recommended cleaning products that are safe and effective for their specific gadgets. Be sure to consult the user manual or manufacturer’s website for guidance on which cleaning solutions to use. Additionally, consider using natural cleaning ingredients like vinegar or baking soda as alternatives to harsh chemicals. These solutions are often safe to use, eco-friendly, and can provide excellent results when properly applied.
Smart Refrigerator Maintenance
Your smart refrigerator plays a central role in your kitchen, so it’s important to keep it clean and well-maintained. Following specific guidelines for interior and exterior cleaning, as well as optimizing temperature settings, will help ensure its longevity and optimal performance.
Guidelines for interior cleaning
Regularly cleaning the interior of your smart refrigerator is essential for food safety and maintaining its efficiency. Start by removing all food items, placing perishables in a cooler to keep them fresh. Take out any removable shelves, drawers, or trays and wash them with warm water and mild detergent. Wipe down the interior walls and floor with a solution of equal parts water and vinegar. This will help remove any residue or odors. Once everything is cleaned and dried, reassemble the shelves and food items, ensuring they are properly organized.
Procedure for exterior cleaning
Cleaning the exterior of your smart refrigerator is just as important as the interior. To clean the exterior surfaces, use a soft cloth or sponge dampened with a mild detergent and warm water. Avoid using abrasive cleaners or rough materials that may scratch or damage the finish. Pay attention to handles, buttons, and control panels, as they often accumulate fingerprints and dirt. For stainless steel finishes, make sure to use a cleaner specifically designed for stainless steel to prevent any damage or discoloration.
Optimizing temperature settings
Proper temperature settings are crucial for maintaining food freshness and preventing spoilage. Consult your smart refrigerator’s user manual to understand the recommended temperature ranges for different compartments, such as the main fridge section, freezer, and vegetable drawer. Set the temperatures accordingly and regularly monitor them to ensure they remain within the desired range. By optimizing the temperature settings, you’ll not only extend the shelf life of your food but also reduce energy consumption.
Cleaning and Maintaining Oven and Range Hoods
Your smart oven and range hoods are essential for cooking delicious meals. To keep them functioning properly and prolong their lifespan, it’s crucial to understand their self-cleaning features, cleaning procedures, and how to maintain the range hood filter.
Understanding self-cleaning features
Many smart ovens come equipped with self-cleaning features that help save time and effort. These features utilize high temperatures to burn off food residues and grease, transforming them into ash that can be easily wiped away. Consult your oven’s user manual to understand how to activate and use the self-cleaning function safely. It’s essential to follow the provided instructions carefully and remove any accessories or racks before initiating the process.
Procedures for cleaning the oven’s interior
Regularly cleaning the oven’s interior is necessary to prevent the buildup of food debris and grime. Once the self-cleaning cycle is complete, allow the oven to cool down before wiping away any remaining ash with a damp cloth or sponge. For stubborn stains, create a paste using baking soda and water and apply it to the affected areas. Let the paste sit for a few hours, then wipe it away with a damp cloth. Avoid using abrasive materials or harsh cleaners that may damage the oven’s surface.
Cleaning and replacing the range hood filter
The range hood plays a vital role in keeping your kitchen free of smoke, odors, and grease. To maintain its effectiveness, it’s important to clean and replace the range hood filter regularly. Start by referring to the manufacturer’s instructions on how to remove the filter. Depending on the type of filter (mesh or charcoal), you can either wash it with warm, soapy water or replace it entirely. Cleaning or replacing the filter at least once every three months will ensure proper ventilation and prevent the accumulation of grease.

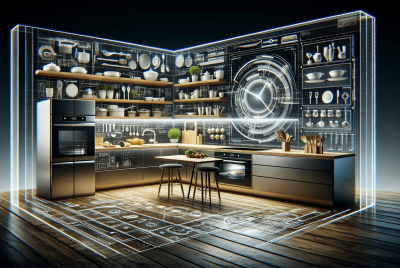
This image is property of images.pexels.com.
Best Practices for Smart Dishwasher Maintenance
A smart dishwasher is a true time-saver when it comes to cleaning your dishes. To keep it working efficiently and extend its lifespan, it’s crucial to establish a cleaning routine, perform deep cleaning periodically, and regularly check and clean the dishwasher filters.
Daily cleaning procedure
After each use, it’s important to clean the dishwasher’s interior to prevent the buildup of food particles and debris. Start by removing any food scraps or chunks from the bottom of the dishwasher. Wipe down the interior walls and racks with a damp cloth or sponge and mild detergent. Take extra care to clean the spray arms and nozzles, as they can become clogged with food residue. Lastly, leave the dishwasher door slightly ajar to allow it to air dry and prevent the growth of mold or mildew.
Deep cleaning your dishwasher
Performing a deep cleaning of your smart dishwasher every few months will help eliminate any lingering odors and ensure optimal performance. Start by emptying the dishwasher and removing any removable components, such as racks or utensil baskets. Place these items in warm, soapy water to soak. Next, use a toothbrush or soft brush to scrub the interior walls, door, and crevices. Pay close attention to the filters and drain, removing any debris that may have accumulated. Finally, run an empty cycle with a dishwasher cleaner or a mixture of vinegar and baking soda to eliminate any remaining residue.
Checking and cleaning dishwasher filters
Dishwasher filters play a crucial role in preventing food particles from clogging the spray arms and pump. It’s essential to regularly check and clean these filters to ensure proper dishwasher functionality. Consult your dishwasher’s user manual to locate the filters and understand how they are removed. Most filters can be simply rinsed under warm water to remove any trapped debris. If the filters are excessively dirty or damaged, they may require replacement. By keeping the filters clean, you’ll ensure that your dishes come out spotless and your dishwasher remains in optimal condition.
Tips for Cleaning a Smart Coffee Maker
Starting your day with a fresh cup of coffee from your smart coffee maker is a treat, but it’s important to keep it clean and maintained for optimal performance. Establishing a daily cleaning routine, descaling periodically, and maintaining the coffee maker’s components are key to achieving a delicious brew every time.
Daily cleaning routine
To keep your smart coffee maker clean on a daily basis, start by removing and emptying the used coffee grounds and rinsing the brewing basket with warm water. Wipe down the exterior surfaces with a damp cloth to remove any spills or stains. Pay special attention to the water reservoir and the coffee pot, ensuring they are thoroughly cleaned and dried before the next use. Lastly, regularly clean the coffee maker’s buttons and control panel with a cloth dampened with a mild detergent solution to remove any coffee residue or fingerprints.
Descaling the coffee maker
Descaling is an essential step in maintaining your smart coffee maker’s performance and preventing the buildup of mineral deposits. Depending on the hardness of your water, descaling should be performed every three to six months. Consult your coffee maker’s user manual for specific descaling instructions, as the process may vary between different models. Typically, it involves running a descaling solution or a mixture of vinegar and water through the coffee maker, followed by several cycles of rinsing with clean water. This process helps remove any scale and mineral buildup, ensuring that your coffee maker continues to produce a delicious cup of coffee.
Maintaining the coffee maker for optimal performance
Regular maintenance of your smart coffee maker is essential to ensure its longevity and optimal performance. In addition to daily cleaning and periodic descaling, there are a few other steps you can take to keep your coffee maker in top shape. It’s advisable to replace the water filter regularly, following the manufacturer’s recommendations. This will help remove impurities and provide better-tasting coffee. Additionally, check for any clogs in the coffee maker’s spout or tubes and remove any residue using a cleaning brush or a toothpick. By incorporating these maintenance practices into your routine, you’ll be able to enjoy a consistently great cup of coffee for years to come.

This image is property of images.pexels.com.
Cleaning and Maintaining Smart Blenders and Food Processors
Smart blenders and food processors are versatile kitchen gadgets that make food preparation a breeze. By following simple cleaning practices after each use, tackling stubborn food residues, and ensuring proper lubrication of moveable parts, you’ll keep your appliances in excellent condition.
Cleaning after every use
After using your smart blender or food processor, it’s important to clean the removable parts promptly to avoid the buildup of hardened food residues. Start by disassembling the components and rinsing them under warm water. For sticky or greasy residues, use a soft brush or sponge with mild detergent to gently scrub the surfaces. Pay extra attention to the blades, as they can be sharp, and always handle them with caution. Avoid immersing the motor base or any electrical components in water. Instead, wipe them down with a damp cloth to remove any spills or splatters.
Rooting out stubborn food residues
Sometimes, food residues can become stubborn and difficult to remove with regular cleaning methods. To tackle these residues, create a paste using baking soda and water, then apply it to the affected areas. Let the paste sit for a few minutes to loosen the residue, then use a brush or sponge to scrub it away. For particularly tough residues, consider using a specialized food-safe cleaning product designed for removing stubborn stains. Always rinse the components thoroughly after cleaning and ensure they are completely dry before reassembling the blender or food processor.
Lubricating any moveable parts
To keep your smart blender or food processor operating smoothly, it’s important to lubricate any moveable parts periodically. This is especially true for appliances with motorized bases that involve spinning or rotating components. Consult your user manual or the manufacturer’s recommendations to determine the appropriate lubricant for your specific appliance. Apply a small amount of the recommended lubricant to the designated areas, making sure not to over-lubricate. This simple step will help reduce friction and wear on the moving parts, ensuring the longevity and performance of your smart blender or food processor.
Best Practices for Cleaning Smart Microwaves
A smart microwave is a convenient and versatile appliance in any kitchen. Regular cleaning and maintenance are essential to ensure its safe operation and optimal performance. By following daily maintenance tips, performing periodic deep cleaning, and using the microwave safely, you’ll be able to enjoy your smart microwave for years to come.
Daily maintenance tips
To keep your smart microwave in good condition on a daily basis, start by wiping down the interior with a damp cloth after each use to remove any food splatters or spills. Pay attention to the door seals and hinges, ensuring they are clean and free from any debris that may affect their functionality. Additionally, regularly clean the turntable and microwave tray to prevent the buildup of food residues. If your microwave has a removable charcoal filter, check it regularly and clean or replace it as needed. By maintaining these daily cleaning habits, you’ll not only ensure a clean and hygienic microwave but also prevent any odors or mold from developing.
Deep cleaning practices
Periodically, it’s necessary to perform a deep cleaning of your smart microwave to eliminate any stubborn stains or odors. Start by unplugging the microwave and removing any removable components, such as the turntable, turntable support, or microwave tray. Soak these components in warm, soapy water to remove any food residues. Next, prepare a mixture of equal parts water and vinegar in a microwave-safe bowl. Place the bowl in the microwave and heat it for several minutes until it generates steam. The steam will help loosen any stubborn stains or dried food residues. Afterward, carefully remove the bowl and wipe down the interior surfaces with a damp cloth or sponge. Finally, dry all the components thoroughly before reassembling them.
Safe usage of microwave
Using your smart microwave safely is essential for both your well-being and the longevity of the appliance. Familiarize yourself with the manufacturer’s guidelines for safe usage, including the types of containers and materials that are microwave-safe. Avoid using metal or foil containers, as they can cause sparks and damage the microwave. Always use microwave-safe lids or covers to prevent splattering. Additionally, be cautious when handling hot containers or food. Use oven mitts or a heat-resistant glove to protect yourself from burns. By following these safety tips, you’ll enjoy a trouble-free experience with your smart microwave.
Maintenance of Smart Cookers and Slow Cookers
Smart cookers and slow cookers are popular kitchen appliances that simplify meal preparation. Properly cleaning the cooker pot, maintaining the heating base, and ensuring operational efficiency will keep your smart cookers and slow cookers in excellent condition.
Cleaning the cooker pot
The cooker pot is the heart of your smart cooker or slow cooker. Cleaning it properly after each use is crucial for preventing the buildup of food residues and maintaining its longevity. Once the cooker pot has cooled down, remove it from the heating base and empty any remaining contents. Depending on the material of the pot (e.g., stainless steel or non-stick), hand wash it with warm, soapy water or place it in the dishwasher if it’s dishwasher-safe. Avoid using abrasive scrub brushes or harsh detergents that may damage the pot’s surface. Once clean, rinse thoroughly and dry completely before reassembling the appliance.
Cleaning the heating base
The heating base of your smart cooker or slow cooker requires regular cleaning to remove any spills or splatters that may have occurred during cooking. Start by unplugging the appliance and allowing it to cool down completely. Once cool, wipe the heating base with a damp cloth to remove any food residues or stains. Pay attention to the control panel, knobs, and any crevices where food particles may have collected. To clean hard-to-reach areas, use a soft brush or toothbrush. Make sure the heating base is completely dry before reconnecting the cooker pot for future use.
Ensuring operational efficiency
To ensure the operational efficiency of your smart cooker or slow cooker, it’s important to monitor its performance regularly. Familiarize yourself with the manufacturer’s recommended cooking times and temperatures for different recipes and adjust as needed. If you notice any changes in cooking times or temperatures, or if the appliance is not heating properly, refer to the user manual for troubleshooting tips or contact the manufacturer for further assistance. By staying proactive and addressing any issues promptly, you’ll keep your smart cooker or slow cooker working efficiently and producing delicious meals.
Ensuring the Longevity of Your Smart Gadgets
To maximize the lifespan of your smart kitchen gadgets, it’s important to follow regular maintenance schedules, seek professional help when needed, and store your gadgets properly when not in use. By incorporating these practices into your routine, you’ll enjoy the benefits of your smart devices for years to come.
Following regular maintenance schedules
Each smart kitchen gadget comes with its own set of maintenance requirements specified by the manufacturer. It’s crucial to follow these maintenance schedules to prevent premature wear and tear and maintain optimal performance. Regularly refer to the user manuals of your gadgets to identify specific maintenance tasks, such as replacing filters, lubricating moving parts, or cleaning certain components. Establish a calendar or reminder system to ensure these tasks are performed at the recommended intervals. By adhering to the maintenance schedules, you’ll extend the lifespan of your smart gadgets and minimize the risk of malfunctions.
Getting professional help when needed
In some instances, it may be necessary to seek professional help for certain maintenance or repair tasks. If you encounter any issues that are beyond your expertise or require specialized knowledge, it’s advisable to contact the manufacturer’s customer support or a certified technician. Attempting to fix complex problems without the proper knowledge or tools may cause further damage or void the warranty. Professional help ensures that your smart gadgets are repaired correctly and extends their lifespan by addressing potential issues more effectively.
Storing your gadgets properly when not in use
Proper storage is crucial when your smart kitchen gadgets are not in use. Before storing your appliances, ensure that they are clean and dry to prevent the growth of mold or mildew. Carefully pack smaller gadgets in their original packaging or protective cases, if available. For larger appliances, such as refrigerators or dishwashers, make sure they are disconnected from power sources and secure any movable parts. Cover them with dust covers or blankets to protect them from dust and scratches. Select a storage space that is cool, dry, and away from direct sunlight or extreme temperatures. By storing your gadgets properly, you’ll safeguard them from unnecessary damage and maintain their condition until they are ready to be used again.
In conclusion, understanding your smart kitchen gadgets, implementing general cleaning procedures, and following specific maintenance guidelines are vital for their optimal performance and longevity. By identifying the parts and features, utilizing manual instructions and digital resources, and understanding the technical specifications, you’ll be better equipped to operate and maintain your gadgets effectively. Regular cleaning, both on a daily basis and through periodic deep cleaning, is crucial to prevent the buildup of dirt, grime, and bacteria. By optimizing the temperature settings of your smart refrigerator, cleaning and maintaining oven and range hoods, and following best practices for dishwasher maintenance, coffee maker cleaning, blender and food processor maintenance, microwave cleaning, and smart cookers and slow cookers maintenance, you’ll ensure that each appliance performs at its best. Finally, by following regular maintenance schedules, seeking professional help when needed, and storing your gadgets properly, you’ll extend their lifespan and continue enjoying the convenience and efficiency of your smart kitchen gadgets for years to come.